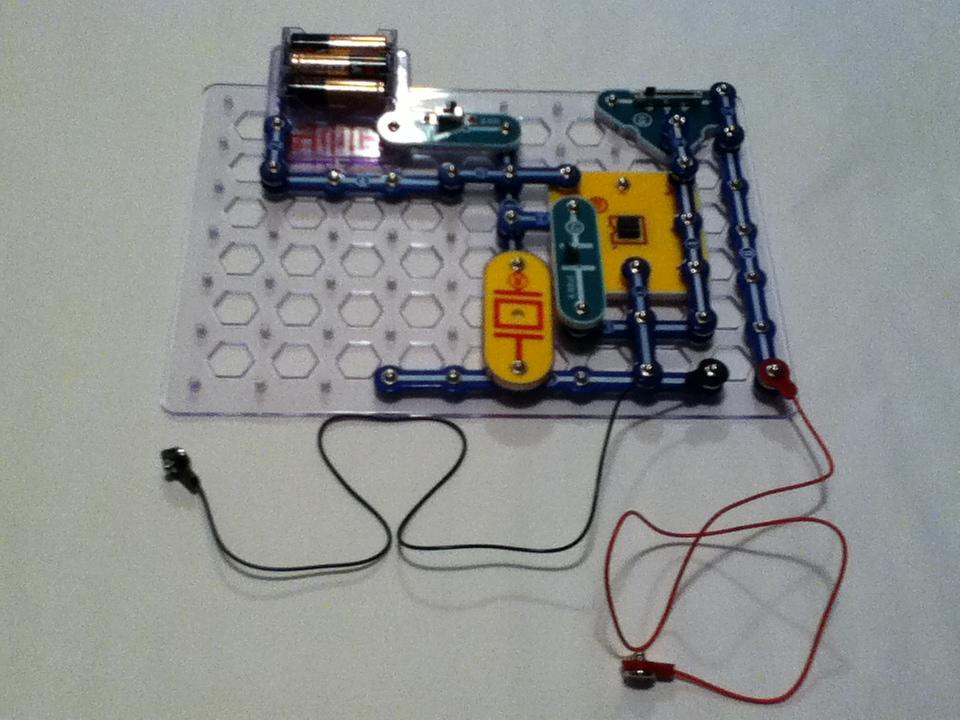
Parts Needed:
1 555 Timer IC (I used a KIA555p, but the NE555 will do just fine)
2 Clothespins
1 Coffee mug
Snap Circuits Parts:
1 Base Grid (11” x 7.7”) # 6SC BG
1 Eight-Pin IC Socket # 6SC ?U8
0.02uF Capacitor # 6SC C1
1 Variable Resistor #6SC RV
1 Whistle Chip # 6SC WC
1 4.5 Volt Battery Holder # 6SC B3
1 Slide Switch # 6SC S1
Jumper Wire 18" (Black) # 6SC J1
Jumper Wire 18" (Red) # 6SC J2
1 Single Snap Conductor # 6SC 01
5 Conductor with 2-snaps # 6SC 02
2 Conductor with 3-snaps # 6SC 03
2 Conductor with 4-snaps # 6SC 04
1 Conductor with 5-snaps # 6SC 05
2 Conductor with 6-snaps # 6SC 05
Build the circuit shown:


Once the circuit is built, use a clothespin to fasten the end of the red Jumper Wire (that’s not connected to the 555 test circuit) to one side of the cup with the snap against the side of the cup 2 to 3 centimeters inside the cup. Use the second clothespin to fasten the end of the black Jumper Wire (that’s not connected to the 555 test circuit) to opposite side of the cup with the snap against the side of the cup 2 to 3 centimeters inside the cup.
Switch the Slide Switch (S1) on. No sound will be heard on the piezoelectric speaker WC (Whistle Chip). Slowly pour tap water (or coffee) into the cup until the liquid level reaches the red and black snaps of the Jumper Wires inside the cup. This will close the circuit of the 555 test circuit and you will hear a tone on the speaker (WC).
Click here to see a video demonstration if the video does not display in the web page.


Comments